项目概述
- 这是一个可以登录jabber账号,获取好友列表,并且能与好友进行聊天的项目。
使用的是第三方库XMPPFramework框架来实现XMPP通讯。
项目地址:XMPP-Project
如果文章和项目对你有帮助,还请给个Star⭐️,你的Star⭐️是我持续输出的动力,谢谢啦😘 - 项目准备工作:搭建好Openfire服务器,安装客户端Spark,登录本项目的用户与登录Spark的另一用户进行XMPP通讯。
- 项目结构概述:
有三个视图控制器LoginViewController,FriendListViewController,ChatViewController
LoginViewController:登录和注册xmpp账号界面
FriendListViewController:获取花名册(好友列表)界面
ChatViewController:和好友进行单聊界面
为此封装了XmppManager类,方便统一管理与服务器的连接、获取好友列表、添加好友、发送聊天消息、获取聊天消息等功能。 - 注意:由于XMPPFramework框架还依赖其他第三方库,如KissXML、CocoaAsyncSocket等,因此用cocoaPods添加XMPPFramework库时,
podfile必须添加use_frameworks!,如下:1
2
3
4
5platform:ios , '8.0'
target 'XMPP' do
use_frameworks!
pod 'XMPPFramework', '~> 4.0.0'
end注册登录
xmpp的注册流程是:先连接xmpp服务器,连接成功后再向xmpp服务器注册账号、密码。
xmpp的登录流程是:先连接xmpp服务器,连接成功后再进行登录的鉴权,即校验密码的准确性。
XmppManager类提供了给LoginViewController注册和登录的接口,如下:1
2
3
4
5
6
7
8
9
10
11//注册
-(void)registerWithName:(NSString *)name andPassword:(NSString *)password result:(RegisterBlock)block{
self.registerBlock = [block copy];
[self connectHost:name andPassword:password andisLogin:NO];
}
//登录
-(void)loginWithName:(NSString *)name andPassword:(NSString *)password result:(LoginBlock)block{
self.loginBlock = [block copy];
[self connectHost:name andPassword:password andisLogin:YES];
}这两个接口共同调用
connectHost:andPassword:result:方法,用于连接xmpp服务器(备注:islogin用来区分是登录还是注册),该方法如下:1
2
3
4
5
6
7
8
9
10
11
12
13
14
15
16
17
18
19
20
21
22
23
24
25
26
27
28
29
30
31
32
33//服务器地址(改成自己电脑的IP地址)
//端口号
-(void)connectHost:(NSString *)usernameStr andPassword:(NSString *)passwordStr andisLogin:(BOOL)islogin{
self.usernameStr = usernameStr;
self.pswStr = passwordStr;
self.isLogin = islogin;
//判断当前没有连接服务器,如果连接了就断开连接
if ([self.xmppStream isConnected]) {
[self.xmppStream disconnect];
}
//设置服务器地址
[self.xmppStream setHostName:HOST];
//设置端口号
[self.xmppStream setHostPort:KPort];
//设置JID账号
XMPPJID *jid = [XMPPJID jidWithUser:self.usernameStr domain:HOST resource:nil];
[self.xmppStream setMyJID:jid];
//连接服务器
NSError *error = nil;
//该方法返回了bool值,可以作为判断是否连接成功,如果10s内顺利连接上服务器返回yes
if ([self.xmppStream connectWithTimeout:10.0f error:&error]) {
NSLog(@"连接成功");
}
//如果连接服务器超过10s钟
if (error) {
NSLog(@"error = %@",error);
}
}由于我设置了电脑充当Openfire服务器,因而电脑当前WiFi的IP地址(比如192.168.3.133)就是Openfire服务器的地址,因而HOST参数要配置电脑当前WiFi的IP地址才能让手机连上Openfire服务器。
注意:由于首次配置Openfire后台服务器时,服务器名称设置了192.168.2.2(因为首次配置时电脑WiFi的IP地址为192.168.2.2),主机名配置127.0.0.1,因此192.168.2.2就作为Openfire服务器的主机名。不管HOST参数设置成什么,收发的XML包的域名(domain)都是192.168.2.2。
Openfire后台服务器配置的客户端连接端口默认是5222,因此这里KPort的值设为5222。后台配置如下: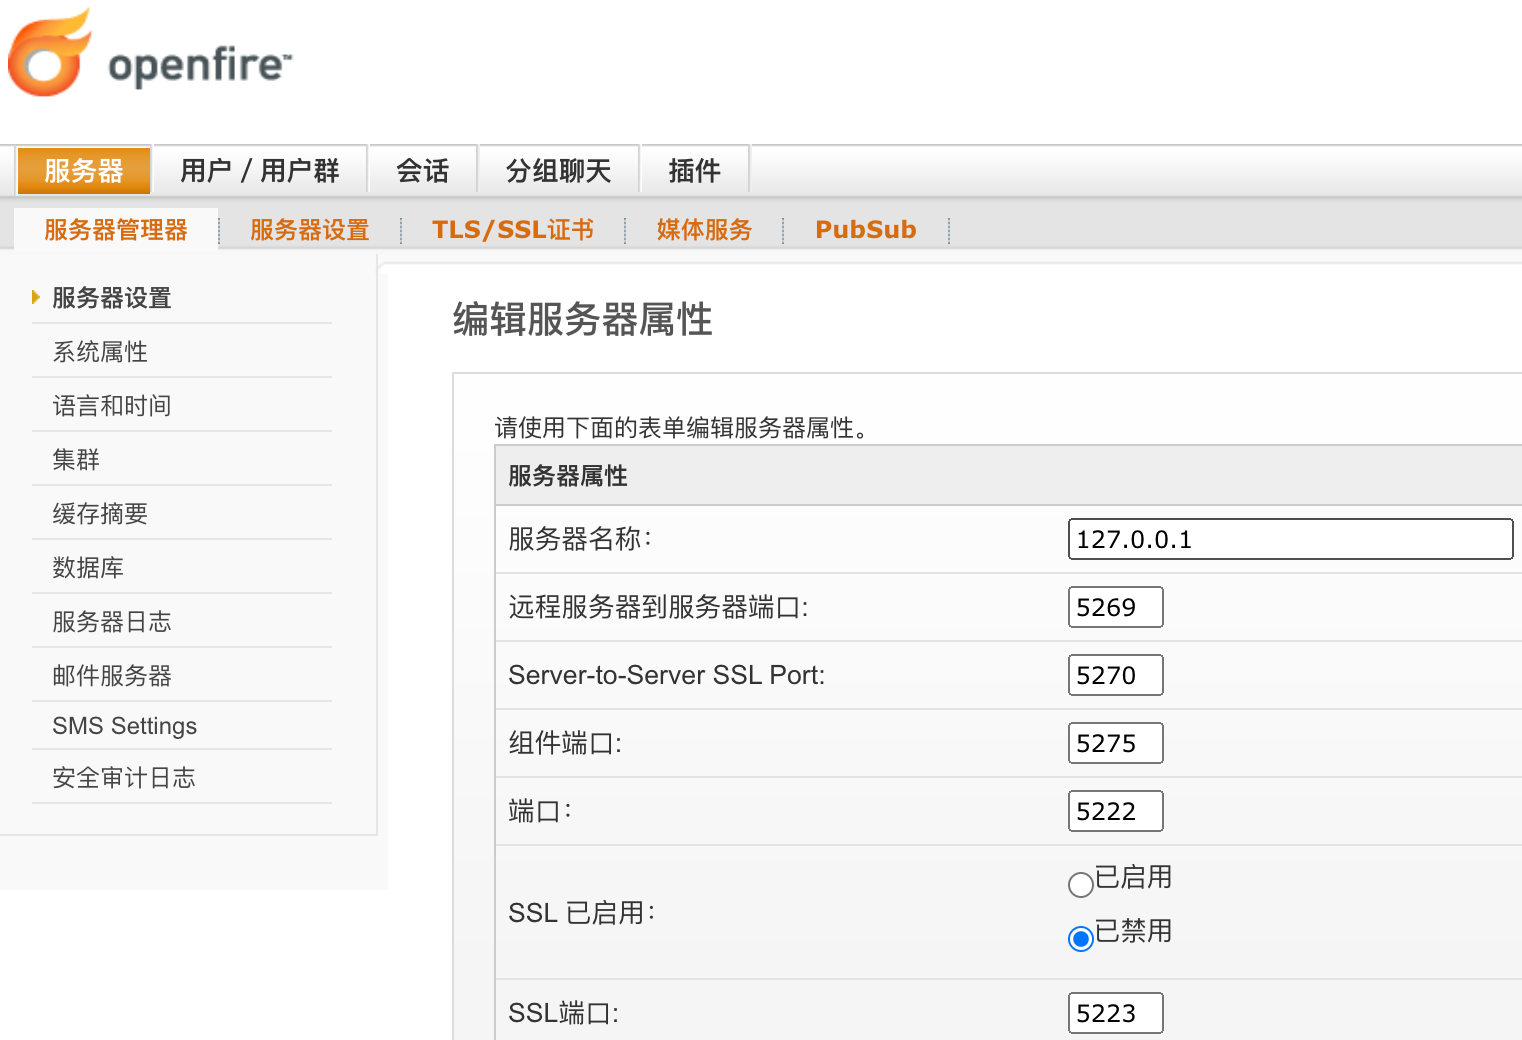
输入账号、密码并按下注册或登录按钮后,app会向XMPP服务器进行连接请求,服务器连接成功会有相应的回调,在连接成功的回调中进行密码校验或账号注册操作。即如下所示:
1
2
3
4
5
6
7
8
9
10
11
12//除了上面可以判断是否连接上服务器外还能通过如下这种形式判断
-(void)xmppStreamDidConnect:(XMPPStream *)sender{
NSLog(@"连接服务器成功");
//这里要清楚,连接服务器成功并不是注册成功或登录成功【可以把“连接服务器成功”当做接收到当前服务器开启了的通知】
if (self.isLogin) {
//进行验证身份(或者叫进行登录)
[self.xmppStream authenticateWithPassword:self.pswStr error:nil];
}else{
//进行注册
[self.xmppStream registerWithPassword:self.pswStr error:nil];
}
}对于注册成功或登录验证成功的回调结果,XmppManager类中有相应的回调方法:
1 | //注册成功的回调 |
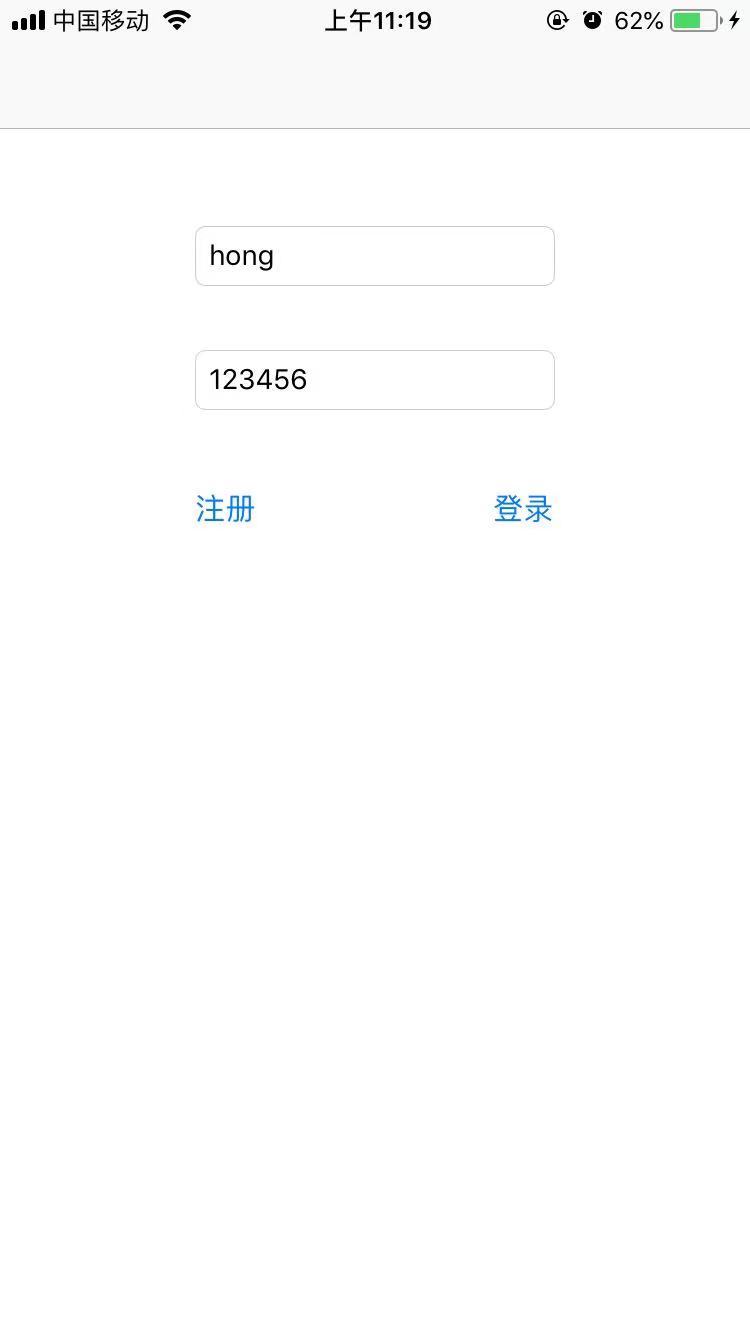
登录界面如下:
添加好友和获取好友列表
添加好友
- 分别注册账号hong、ming、wang,然后登陆hong,再用电脑的Spark客户端登录账号ming。
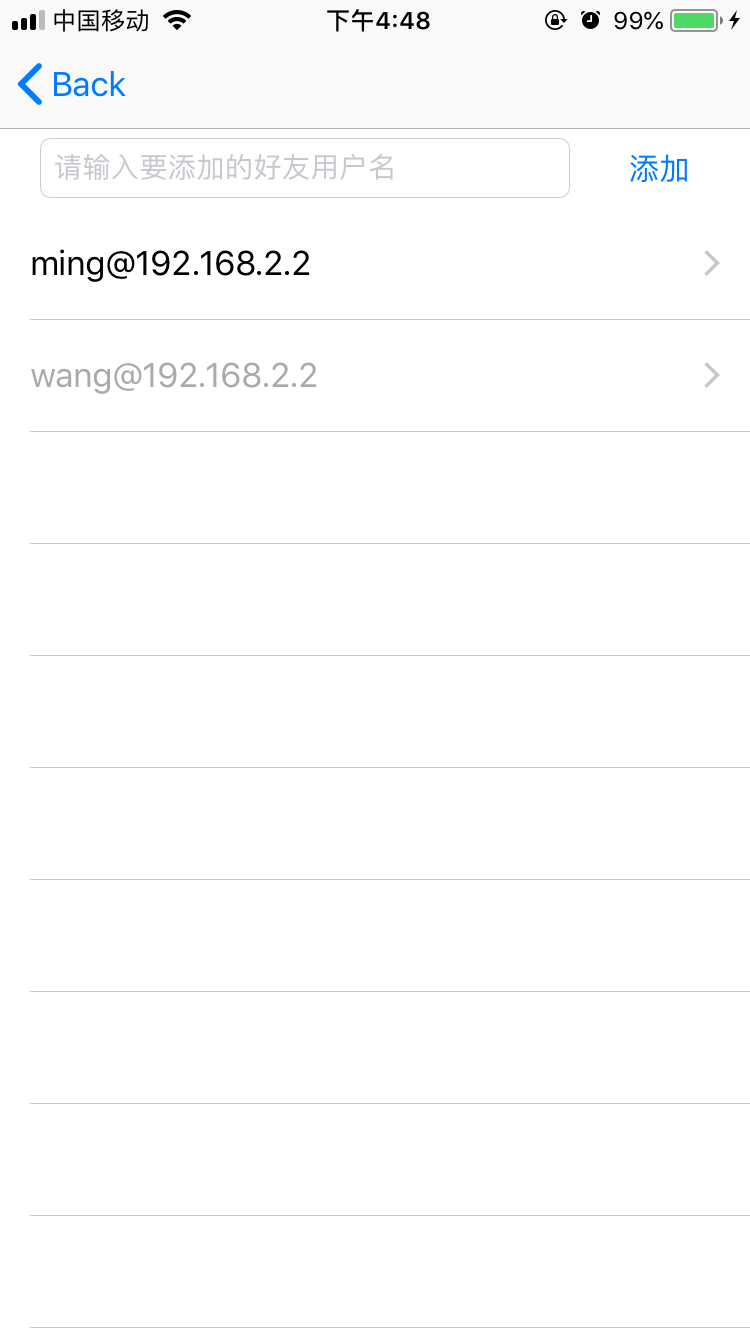
textField输入账号ming,点击“添加”按钮请求添加为好友,这里需要把账号”ming”拼接成JID用户名”ming@192.168.2.2“,代码如下:XmppManager提供了请求添加好友的接口addFriend:。当Spark客户端登录的账号ming做出同意或拒绝的操作时,XmppManager会回调方法1
2
3
4
5
6
7
8
9
10
11
12
13
14- (IBAction)addFriendClick:(UIButton *)sender {
[self.friendTF resignFirstResponder];
NSString *domain = [XmppManager defaultManager].xmppStream.myJID.domain;
NSLog(@"domain:%@", domain);
NSString *jidName = [NSString stringWithFormat:@"%@@%@", self.friendTF.text, domain];
[[XmppManager defaultManager] addFriend:jidName];
UIAlertController *vc = [UIAlertController alertControllerWithTitle:@"已发送添加好友申请" message:@"" preferredStyle:UIAlertControllerStyleAlert];
[self presentViewController:vc animated:YES completion:nil];
dispatch_after(dispatch_time(DISPATCH_TIME_NOW, (int64_t)(1 * NSEC_PER_SEC)), dispatch_get_main_queue(), ^{
[vc dismissViewControllerAnimated:YES completion:nil];
});
}-(void)xmppStream:(XMPPStream *)sender didReceivePresence:(XMPPPresence *)presence,代码如下:1
2
3
4
5
6
7
8
9
10
11
12
13
14
15
16
17
18
19
20
21
22
23
24
25
26
27
28
29
30
31
32
33
34
35
36
37
38
39
40
41
42
43
44
45
46
47
48
49
50
51
52
53
54
55
56
57
58
59
60
61
62
63
64
65
66
67
68
69
70
71
72
73
74
75
76
77
78
79
80
81
82
83
84
85
86
87
88
89
90
91
92
93
94//添加好友
-(void)addFriend:(NSString *)jidName{
XMPPJID *jid = [XMPPJID jidWithString:jidName];
//请求添加jid为好友
[self.xmppRoster subscribePresenceToUser:jid];
_isActiveAdd = YES;
}
-(void)xmppStream:(XMPPStream *)sender didReceivePresence:(XMPPPresence *)presence{
NSLog(@"获取订阅信息presence: %@", presence);
/*
第一次回调
<presence xmlns="jabber:client" from="hong@192.168.2.2/852t6h63tn" to="hong@192.168.2.2/852t6h63tn"></presence>
第二次回调
<presence xmlns="jabber:client" id="FHcB3-42" from="ming@192.168.2.2/HellodeMacBook-Pro.local" to="hong@192.168.2.2/2uc83c92op">
<status>在线</status>
<priority>1</priority>
<c xmlns="http://jabber.org/protocol/caps" hash="sha-1" node="http://www.igniterealtime.org/projects/smack" ver="9LJego/jm+LdNGOFm5gPTMPapl0="></c>
</presence>
*/
//获取哪位好友给我发的信息
//from:ming@192.168.2.2/HellodeMacBook-Pro.local
NSString *from = [presence attributeStringValueForName:@"from"];
XMPPJID *fromJid = [XMPPJID jidWithString:from];
if ([fromJid isEqualToJID:self.xmppStream.myJID]) {
return;
}
//jidUserName:ming@192.168.2.2
NSString *jidUserName = [NSString stringWithFormat:@"%@@%@", fromJid.user, fromJid.domain];
// NSLog(@"friend--: %@", jidUserName);
if ([presence.type isEqualToString:@"unavailable"]) {//下线
[self updateJidName:jidUserName status:0];
}else if ([presence.type isEqualToString:@"subscribe"] ) {
NSLog(@"对方想添加我为好友");
if (_isActiveAdd == NO) {
if (self.beAddedFriendBlock) {
self.beAddedFriendBlock(jidUserName);
}
}
_isActiveAdd = NO;
}else if ([presence.type isEqualToString:@"subscribed"]) {
NSLog(@"对方已经同意我的加好友请求");
}else if ([presence.type isEqualToString:@"unsubscribe"] ||
[presence.type isEqualToString:@"unsubscribed"]) {
if ([presence.type isEqualToString:@"unsubscribe"]) {
NSLog(@"对方已将我删除");
}else if ([presence.type isEqualToString:@"unsubscribed"]){
NSLog(@"对方拒绝我的加好友请求");
}
//如果存在该好友,则移除
NSArray *arr = [self.friendList copy];
for (UserModel *model in arr) {
if ([jidUserName isEqualToString:model.jidUserName]) {
[self.friendList removeObject:model];
//返回更新后的好友数组
if (self.friendListBlock) {
self.friendListBlock(self.friendList);
}
break;
}
}
}else{
//默认为上线
[self updateJidName:jidUserName status:1];
}
}
-(void)updateJidName:(NSString *)jidUserName status:(int)status{
//如果存在该好友,则更新好友的在线状态
for (UserModel *model in self.friendList) {
if ([jidUserName isEqualToString:model.jidUserName]) {
model.status = status;
//返回更新后的好友数组
if (self.friendListBlock) {
self.friendListBlock(self.friendList);
}
return;
}
}
//如果不存在该好友,则先添加到好友列表中
UserModel *model = [[UserModel alloc] init];
model.jidUserName = jidUserName;
model.status = status;
[self.friendList addObject:model];
if (self.friendListBlock) {
self.friendListBlock(self.friendList);
}
}
获取好友列表
- 要获取到好友列表需要根据xmpp的花名册格式来编写xml包,然后将xml包发送给服务器,即向服务器发起获取好友花名册的请求。以下是在FriendListViewController的viewDidLoad方法中的代码:
XmppManager提供了请求获取好友接口requestFriends,当服务器返回好友列表时,XmppManager类会回调
1
2
3
4
5
6
7
8
9
10
11
12
13
14
15- (void)viewDidLoad {
[super viewDidLoad];
// Do any additional setup after loading the view.
//设置回调block
[XmppManager defaultManager].friendListBlock = ^(NSArray *friends) {
NSLog(@"friendcount:%d", (int)friends.count);
[self.friendArr removeAllObjects];
[self.friendArr addObjectsFromArray:friends];
[self.tableView reloadData];
};
//向服务器请求好友列表
[[XmppManager defaultManager] requestFriends];//向服务器请求好友列表
}-(BOOL)xmppStream:(XMPPStream *)sender didReceiveIQ:(XMPPIQ *)iq方法,代码如下:获取好友列表界面如下:1
2
3
4
5
6
7
8
9
10
11
12
13
14
15
16
17
18
19
20
21
22
23
24
25
26
27
28
29
30
31
32
33
34
35
36
37
38
39
40
41
42
43
44
45
46
47
48
49
50
51
52
53
54
55
56
57
58
59
60
61
62
63
64
65
66
67
68
69
70
71
72
73
74
75
76
77
78
79
80
81
82
83
84//请求获取好友
-(void)requestFriends{
//以下包含iq节点和query子节点
/**
<iq from="hong@192.168.2.2/750tnmoq3l" id="1111" type="get">
<query xmlns="jabber:iq:roster"></query>
</iq>
*/
NSXMLElement *iq = [NSXMLElement elementWithName:@"iq"];
//拼接属性节点from,id,type
//属性节点"from"的值为jid账号
[iq addAttributeWithName:@"from" stringValue:[XmppManager defaultManager].xmppStream.myJID.description];
//id是消息的标识号,到时需要查找消息时可以根据id去找,id可以随便取值
[iq addAttributeWithName:@"id" stringValue:JFriendListID];
//类似http的Get请求,发出获取好友的请求。服务器的响应数据中type为result,id对应1111
[iq addAttributeWithName:@"type" stringValue:@"get"];
//query是单节点,xmlns为它的属性节点
NSXMLElement *query = [NSXMLElement elementWithName:@"query"];
//拼接属性节点xmlns,固定写法
[query addAttributeWithName:@"xmlns" stringValue:@"jabber:iq:roster"];
//iq添加query为它的子节点
[iq addChild:query];
//发送请求获取好友的xml包
[self.xmppStream sendElement:iq];
}
//服务器返回的IQ信息。比如花名册数据(即好友列表)
//该方法可能多次返回相似的数据,可通过id值过滤,判断服务器是响应什么请求
- (BOOL)xmppStream:(XMPPStream *)sender didReceiveIQ:(XMPPIQ *)iq{
NSLog(@"didReceiveIQ:%@",iq);
/**
第一次回调
<iq xmlns="jabber:client" type="result" id="1111" to="hong@192.168.2.2/2uc83c92op">
<query xmlns="jabber:iq:roster" ver="204617739">
<item jid="ming@192.168.2.2" subscription="both"/>
<item jid="wang@192.168.2.2" name="wang" ask="subscribe" subscription="from">
<group>我的联系人</group>
</item>
</query>
</iq>
第二次回调
<iq xmlns="jabber:client" type="get" id="515-72" to="hong@192.168.2.2/2uc83c92op" from="192.168.2.2">
<query xmlns="jabber:iq:version"></query>
</iq>
*/
//获取好友列表
//由于iq节点里面只有一个子节点query,所以可以直接用childElement获取其子节点query
NSXMLElement *query = iq.childElement;
if ([iq.elementID isEqualToString:JFriendListID]) {
NSLog(@"好友花名册");
NSArray *friends = [self.friendList copy];
//query.children:获得节点query的所有孩子节点
for (NSXMLElement *item in query.children) {
NSString *friendJidString = [item attributeStringValueForName:@"jid"];
BOOL shouldAdd = YES;
for (UserModel *model in friends) {
if ([friendJidString isEqualToString:model.jidUserName]) {
shouldAdd = NO;
break;
}
}
if (shouldAdd) {
UserModel *newmodel = [[UserModel alloc] init];
newmodel.jidUserName = friendJidString;
newmodel.status = 0;
//添加到数组中
[self.friendList addObject:newmodel];
}
}
if (self.friendListBlock) {
self.friendListBlock(self.friendList);
}
}
return YES;
}
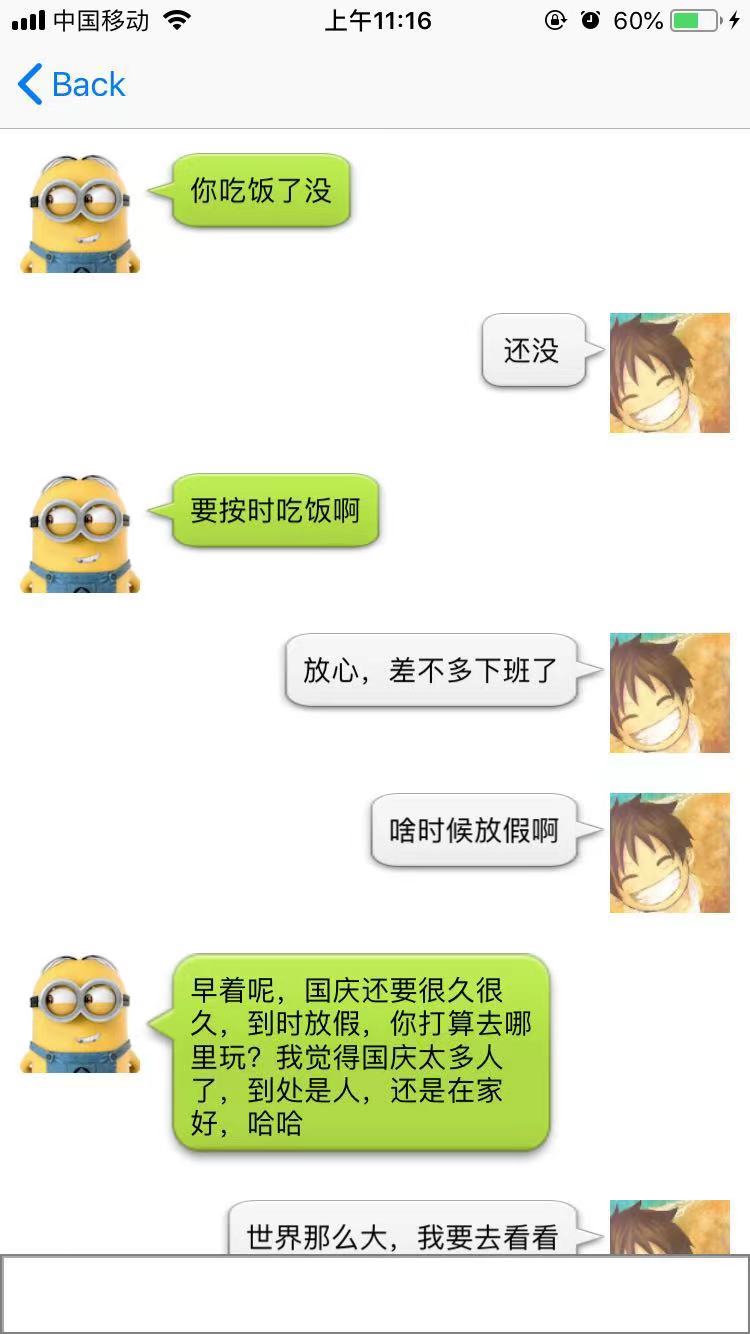
单聊界面
- 当我们获取到好友列表后,针对某一好友进行聊天,我们得区分自己与好友,项目采用的是Message类,里面有如下属性:isOwn用来区分自己与好友对方,contentString即表示自己或好友发送消息的内容。本次ChatViewController在tableView中只用了一种cell,实际开发还是建议区分开来。在ChatViewController的主要代码如下:
1
2
3
4
5
6
@interface Message : NSObject
//内容
@property(nonatomic,copy)NSString *contentString;
//谁的信息
@property(nonatomic,assign)BOOL isOwn;
@endcell内部根据isOwn区分自己和好友,进而调整子控件的frame,代码如下:1
2
3
4
5
6
7-(UITableViewCell *)tableView:(UITableView *)tableView cellForRowAtIndexPath:(NSIndexPath *)indexPath{
//获取信息模型
Message *model = self.messageArr[indexPath.row];
ChatCell *cell = [tableView dequeueReusableCellWithIdentifier:@"ChatCell"];
[cell setCellWithModel:model];
return cell;
}把自己说的文本用textField代理方法发送出去,即如下:1
2
3
4
5
6
7
8
9
10
11
12
13
14
15
16
17
18
19
20
21
22
23
24
25
26
27
28
29
30
31
32
33
34
35
36-(void)setCellWithModel:(Message *)model{
_contentLabel.text = model.contentString;
CGRect contentRect = [model.contentString boundingRectWithSize:CGSizeMake([UIScreen mainScreen].bounds.size.width-100-90, MAXFLOAT) options:NSStringDrawingUsesLineFragmentOrigin attributes:@{NSFontAttributeName:[UIFont systemFontOfSize:14]} context:nil];
CGFloat screenWidth = [UIScreen mainScreen].bounds.size.width;
CGFloat contentWidth = contentRect.size.width;
CGFloat contentHeight = contentRect.size.height;
CGFloat popWidth = contentWidth + 40;
CGFloat popHeight = contentHeight + 25;
if (model.isOwn) { //自己
_headerImageView.image = [UIImage imageNamed:@"icon01"];
//头像
_headerImageView.frame = CGRectMake(screenWidth-70, 10, 60, 60);
//气泡的图片
CGFloat popX = screenWidth - popWidth - 70;
_popoImageView.frame = CGRectMake(popX, 10, popWidth, popHeight);
UIImage * image = [UIImage imageNamed:@"chatto_bg_normal.png"];
image = [image stretchableImageWithLeftCapWidth:45 topCapHeight:12];
_popoImageView.image = image;
//聊天内容的label
_contentLabel.frame = CGRectMake(15, 10, contentWidth, contentHeight);
}else{ //好友
_headerImageView.image = [UIImage imageNamed:@"icon02"];
_headerImageView.frame = CGRectMake(10, 10, 60, 60);
_popoImageView.frame = CGRectMake(70, 10, popWidth, popHeight);
UIImage * image = [UIImage imageNamed:@"chatfrom_bg_normal.png"];
image = [image stretchableImageWithLeftCapWidth:45 topCapHeight:55];
_popoImageView.image = image;
_contentLabel.frame = CGRectMake(25, 10, contentWidth, contentHeight);
}
}XmppManager提供了发送消息的接口sendMessageText:jidUserName:,可将文本包装成XML消息包发送给服务器,如下:1
2
3
4
5
6
7
8
9
10
11
12
13
14
15
16
17
18
19//点击return键发送信息
-(BOOL)textFieldShouldReturn:(UITextField *)textField{
if (textField.text.length == 0) {
return YES;
}
[[XmppManager defaultManager] sendMessageText:textField.text jidUserName:self.chatName];
Message *myMes = [[Message alloc] init];
myMes.contentString = textField.text;
myMes.isOwn = YES;
[self.messageArr addObject:myMes];
[self archiverWithArray:self.messageArr];
[self.tableView reloadData];
self.messageTF.text = @"";
[_tableView scrollToRowAtIndexPath:[NSIndexPath indexPathForRow:self.messageArr.count-1 inSection:0] atScrollPosition:UITableViewScrollPositionBottom animated:YES];
return YES;
}当好友发消息给我时,xmpp在XmppManager类会触发相应的回调,如下:1
2
3
4
5
6
7
8
9
10
11
12
13
14
15
16
17
18
19
20
21
22
23
24
25
26
27
28
29//发送消息
-(void)sendMessageText:(NSString *)text jidUserName:(NSString *)jidUserName{
/*
<message from="hong@192.168.2.2/t7i1lbc63" id="2222" to="wang@192.168.2.2" type="chat">
<body>准备吃饭了</body>
</message>
*/
if (text.length == 0) {
return;
}
NSXMLElement *message = [NSXMLElement elementWithName:@"message"];
XMPPJID *jid = self.xmppStream.myJID;
//拼接属性节点
[message addAttributeWithName:@"from" stringValue:jid.description];
[message addAttributeWithName:@"id" stringValue:@"2222"];
[message addAttributeWithName:@"to" stringValue:jidUserName];
//什么类型xml包,chat表示单聊。lang表示语言,拼不拼接都无所谓
[message addAttributeWithName:@"type" stringValue:@"chat"];
NSXMLElement *body = [NSXMLElement elementWithName:@"body"];
//设置发送的信息
[body setStringValue:text];
//添加子节点
[message addChild:body];
//发送xml包请求
[self.xmppStream sendElement:message];
}以上getMessageBlock是ChatViewController用来获取好友聊天消息的Block,ChatViewController的viewDidLoad方法相关代码如下:1
2
3
4
5
6
7
8
9
10
11
12
13
14
15
16
17
18
19
20
21
22
23
24
25//收到服务器返回的聊天消息
-(void)xmppStream:(XMPPStream *)sender didReceiveMessage:(XMPPMessage *)message{
NSLog(@"message=%@",message);
/*
<message xmlns="jabber:client" to="hong@192.168.2.2/t7i1lbc63" id="bFTVn-127" type="chat" from="wang@192.168.2.2/HellodeMacBook-Pro.local">
<thread>ykBwqQ</thread>
<body>好的</body>
<x xmlns="jabber:x:event">
<offline/>
<composing/>
</x>
<active xmlns="http://jabber.org/protocol/chatstates"></active>
</message>
*/
if ([message.type isEqualToString:@"chat"]) { //表示聊天
NSXMLElement *body = [message elementForName:@"body"];
//NSLog(@"body = %@",body); //打印:body = <body>好的</body>
NSString *messageText = [body stringValue];
if (self.getMessageBlock) {
self.getMessageBlock(messageText);
}
}
}1
2
3
4
5
6
7
8
9
10
11
12
13
14
15
16
17
18
19
20
21
22
23
24
25- (void)viewDidLoad {
[super viewDidLoad];
if ([self unarchiver]) {
[self.messageArr addObjectsFromArray:[self unarchiver]];
[self.tableView reloadData];
}
//设置回调
[XmppManager defaultManager].getMessageBlock = ^(NSString *messageText){
if (messageText==nil || [messageText isEqualToString:@""]) {
return;
}
Message *otherMes = [[Message alloc] init];
otherMes.contentString = messageText;
otherMes.isOwn = NO;
//添加到数组当中
[self.messageArr addObject:otherMes];
[self archiverWithArray:self.messageArr];
[self.tableView reloadData];
[self.tableView scrollToRowAtIndexPath:[NSIndexPath indexPathForRow:self.messageArr.count-1 inSection:0] atScrollPosition:UITableViewScrollPositionBottom animated:YES];
};
} - 这里打算用归档(NSKeyedArchiver)的方式存储用户的聊天记录。
由于每条聊天记录都是一个Message模型,Message模型必须实现归档(encodeWithCoder:)和解档(initWithCoder:),这样才能使用NSKeyedArchiver把模型数组存储到沙盒中。
ChatViewController类中归档和解档代码如下:单聊界面如下:1
2
3
4
5
6
7
8
9
10
11
12
13
14
15
16
17
18
19
20-(void)archiverWithArray:(NSMutableArray *)array{
NSString *documentPath = [NSSearchPathForDirectoriesInDomains(NSDocumentDirectory, NSUserDomainMask, YES) lastObject];
NSString *filePath = [documentPath stringByAppendingFormat:@"/%@/%@", MessageHistory, self.chatName];
NSFileManager *fm = [NSFileManager defaultManager];
if (![fm fileExistsAtPath:filePath]) {
[fm createFileAtPath:filePath contents:nil attributes:nil];
}
[NSKeyedArchiver archiveRootObject:array toFile:filePath];
}
-(NSMutableArray *)unarchiver{
NSString *documentPath = [NSSearchPathForDirectoriesInDomains(NSDocumentDirectory, NSUserDomainMask, YES) lastObject];
NSString *filePath = [documentPath stringByAppendingFormat:@"/%@/%@", MessageHistory, self.chatName];
NSFileManager *fm = [NSFileManager defaultManager];
if ([fm fileExistsAtPath:filePath]) {
NSMutableArray *array = [NSKeyedUnarchiver unarchiveObjectWithFile:filePath];
return array;
}
return nil;
}